Tuesday, October 30, 2012

Thinking About Our Friends in the Path of Destruction


As I sit and ponder the devastation that has occurred in the last 24 hours to our Atlantic Coast friends, I am grateful that one day in the near future the power will be restored and lives can begin getting back to some sort of normalcy.


It seems surreal (especially to me as I sit on the Pacific Coast and only have to worry about a little chilly gray rainy day) that so much damage can occur from one moment in time.


May each of you that have been directly affected yourself or have family affected know that your neighbors across the country care and are praying for safety, health and comfort.


(I share these photos from the beach, as they remind me of starting fresh after a disaster.)

Friday, October 19, 2012

Beach Cottage Decor Bottle Upcycle

I am a lucky gal, as my husband saved a Blue Sapphire Gin bottle for me thinking that I might be able to put it to good use and he was right. My heart was a patter, as I knew that this color would be just right for a beach cottage look.

I soaked the bottle, scraped with a scraper and finally used Goo Gone to remove the sticky label, removed the cap and used wire cutters to remove the ring that kept the cap sealed prior to opening the bottle. Unfortunately, the side of the bottles has raised print formed into the glass, but it is small and not obtrusive.


When we went to the beach (Ocean Shores, WA) a couple of weeks back - yes you can drive on some beaches in our Washington, as it is an extension of the state highway.


 I stopped at a gift shop that carries beach souvenirs and purchased a few bleached starfish in different sizes to add to my craft supplies. One of the starfish would be just right for this project. 

 
Sand was added to the bottle for a beachy look. I fit the bottle with a cork, gouged out a cavity to fit an arm of the starfish, hot-glued the arm in place and wrapped the neck of the bottle and top of the cork in small bridal trim pearls, hot-gluing done as I wrapped.


An easy peazy project. I also made one with bling; don't have a picture on that one but just imagine vintage clear rhinestone chain in place of the pearl trim. It was beautiful and sold immediately after placing in my shop. 


You can see the raised print in the glass in the picture above. Luckily, only on two sides, so it does not distract from the essence of the bottle.


Enjoy and try this, you won't be disappointed!


This week Shabby Gr8 Dane will be partying with:


Monday, October 15, 2012

Dreamy No Sew Angel Wings

I, like others, was attracted to the No Sew Angel Wings Tutorial posted by Dawn at The Feathered Nest. 

 
I purchased the tutorial and set out to make a pair using materials that I had in my stockpile. I wanted the wings slightly larger, so I used my copier to enlarge the wings, but since I only had 8.5 X 11 inch paper, I had to be creative. I got a one side of the wing larger on the paper (the other wing was somewhat missing, as were the tips of both wings). So I cut good wing out and flipped it over on a clean sheet of copy paper and traced it. Cut the traced wing out and taped the two together to make a pair of wings. Voila!
 
 
I am a sports fanatic and made this pair of wings during a football game that I was watching on television. Oh, yeah, the Seattle Seahawks won at the last minute. A great come from behind win. And on top of it I had a romantic pair of angel wings!


 I used curly/crinkled seam binding that I created myself. When I am out thrifting, I look for unopened packages of 100% rayon seam binding (also called seam tape). Make sure that it is 100% percent rayon and not the new packages of 100% polyester. These packages come in 3 yard lengths and I can usually pick them up for under 25 cents. I take take ribbon out of the package, spritz it with water to get it wet, scrunch it up and them place it in the corner of a plastic bag. Take the bag, wad it tight by twisting the bag right above the ribbon and tie it off with a piece of twine or twisty. Let it sit overnight and then take out of the bag. Loosen the wad slightly and let it sit on the counter to dry out. Turning and loosely wadding back up every couple of hours. Easy curly/crinkled seam ribbon for a very reasonable price.


Because the rayon seam binding is vintage, sometimes the seam binding has an odor. Many times you don't notice the odor until you are spritzing the ribbon. If this occurs I take the ribbon and soak it in Oxyclean for a few hours, rinse well and wad it up and put it in the plastic bag.

 
The bling is an vintage earring, cut off the clip and hot glued to the middle of the crinkled ribbon bow.

If you want an easy, quick craft that would be an awesome Christmas gift, check out The Feathered Nest tutorial.

This week Shabby Gr8 Dane will be partying with:


Saturday, September 15, 2012

An Afternoon of Vintage Blessings

There are times when I visit blogs where the author has posted their weekend finds and my heart is a little envious (shh! don't tell anyone, as a jealous heart is not good, so you see why I used a envious, as it just doesn't seem to relay the same connotation that jealous does, at least in my mind). I know that the commandment says not to covet thy neighbor. (Good thing I am not in Mr Swem's math class or he just might whack that ruler over my knuckles for not behaving like a proper lady!) Aren't we glad that our children don't go to school in the early 70's.

 
I decided that I would go to a couple of garage sales after I was done providing therapy. On the way to the garage sales, I drove by our local St. Vincent DePaul and the reader board said 1/2 off housewares, hardware and furniture. Oh boy, must stop. Found a few things - ironstone coffee pot, brass colored metal finial, ormolu cherub lipstick holder, carte posta wall hanging, metal floral picture frame and wire pedestal basket with braided jute trim.

 
Then on to the two garage sales. First one, nothing. The second one, well what can I say...... my heart was aflutter. A Royal glass keyed working typewriter with its own tweed case, 


a family scale with a large amount of patina,


  a small glass cloche and gray, brown and tan decor balls with a Frenchie type design, just perfect for the jute topped wire pedestal bowl that I found an hour earlier at St. Vincent DePaul.


 Oh boy! did I score today or what? I can no longer be envious, because today I was blessed. In addition, I actually think that this display makes a nice vignette, double score. All purchased for less than fifty dollars.


Thank you for visiting. May your day be filled with joy and beauty!

This week Shabby Gr8 Dane will be partying with:


Tuesday, September 11, 2012

From Country Cabinet to French Cabinet


I picked up this slim cabinet at a neighborhood's annual garage sale. The adult son was staying with his mom recovering from surgery and accidentally bumped into the cabinet with his wheelchair. The faux stained glass broke, the better for me, as I am always on the hunt for a piece to doll it up with chicken wire.


As you can see by this picture, someone cut out a piece on the backboard, so off came that piece. Not an easy task and to boot I got a couple of slivers, OUCH!

A coat of Annie Sloan Ambusson Blue topped with clear wax and hardware got a spraying of Rustoleum Hammered Silver.


Monday, September 3, 2012

French Demilune Table Created From Dining Room Table


I found this lonely beat up dining room table at a thrift store and knew exactly what it needed to be a well-loved center of attention treasure. Sorry, I forgot to take a picture of the table before my friend's husband cut it just as I wanted, shaking his head the entire time because he could not wrap his head around my vision.


When he was done I had two ends (as well as four legs, not seen in pictures) like the one above and would create two demilune tables, one for my enjoyment and one to add to my 
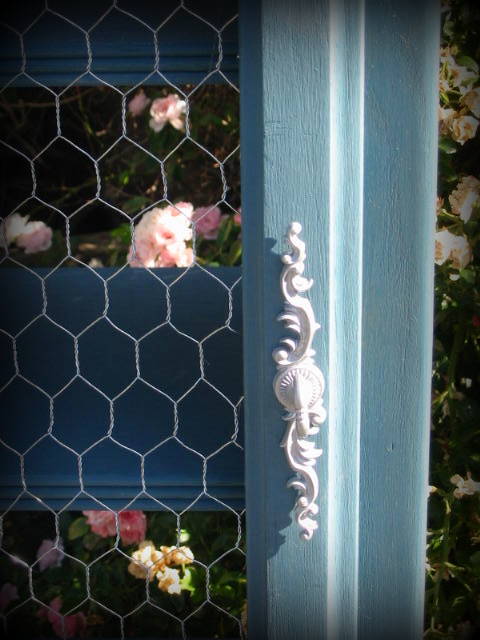
web store. Boy was I excited to get started. I chose French Linen and Paris Gray Annie Sloan Chalk Paint. I used Amaco Rub-n-Buff in Gold Leaf for the indented trim on the table skirt and legs; I finished this table a couple of months ago before Annie Sloan gilding wax became available.


I love the way that French Linen, used on the table top, and Paris Gray, used on the legs and table skirt compliment each other.


The gilding wax puts an icing on the cake so to speak.


I had a hard time taking pictures of the full table, as the only drawback on this table is that it does not have a supporting leg, so the table back will need to be attached to a wall using "L" brackets. Therefore, my overgrown boxwoods serve as the table support wall. Here is another picture with not so great lighting, as it makes the table top look bluish gray.


This week Shabby Gr8 Dane will be partying with:


Thursday, August 30, 2012

French Script Tissue Paper Apples


I was inspired by LittleMissMagggie's blog post regarding French script pears, so I decided to create my own French script fruit. I found a small wooden basket and a few glittered paper mache apples at the thrift store. I downloaded a few French scripts from The Graphic Fairy and copied them onto tissue paper, as outlined on LittleMissMaggie's blog.

First, I painted the apples white, as they were a gaudy gold color. Then, I decoupaged the graphic around the apple, cutting the sides of the graphic to help it lay flat against the apples. I took a marker and colored the stems black.

Next, I painted the small wooden basket with Provence Annie Sloan Chalk Paint and added some raffia to cushion the apples.


Lastly, I glued an apple label that I found on the web.


Wednesday, August 22, 2012

Glamorous Handmade Violet Witch Hazel Perfume Label Bottle


I had fun creating a charming clear glass perfume bottle, utilizing a copy vintage Witch Hazel label. The label is adorned with violets with the background color being cream. So I decided to incorporate cream flowers (a millinery flower and a hand-rolled muslin flower), a spray of purple violets, tulle, crinkled ribbon, rhinestone chain, pearls.


Since the bottle did not have a top, I added a cork stopper. A rhinestone chain encircles the perimeter of the stopper, which is topped with a very unique button that truly is the icing on the bottle, so to speak (really it became the top of the bottle). The button is purple and pink enamel encrusted with rhinestones which perfectly complements the perfume label. 


The bottle is for sale on Etsy or in our online store.  


Monday, June 11, 2012

I Hate Throwing Things Away


What do you do when you have an oops project? The pieces, one of which is above and was intended to cover a seat cushion for a dining room chair that I was re-purposing, to this project sat around for awhile because I hate to throw things away. The picture does not really show the oops, but it is there. The original printed paper that I was burnishing onto the fabric shifted and when I was finished with the burnishing there was a shadow on some of the letters and the cluster of grapes was very blurry. The appliqued insert did not have enough room for a seam (it was originally meant to be in the middle piece of a slipcover for an ottoman), which is what I needed for the project that it was created for. So after sitting for a couple of months,  I finally came up with a plan. 


Put the two oops projects together to make a throw pillow. I covered the above oops (osnaburg fabric) by appliqueing the other oops (unbleached muslin) over the top. Looking great at this point with one exception - the appliqued fabric piece did not quite cover the oops on the bottom fabric. So to the rescue sweet rolled unbleached muslin and tea dyed muslin rosettes.


I am tickled pink that my two oops projects are no longer in the pile to throw away!

I will be partying with the following this week: